Instructions for Use
Denture Retention Attachment
Caution: US federal law restricts this product for sale by or on order of a dentist.
Abutments are shipped non-sterile and must be sterilized before use. See sterilization instructions below.
Denture Retention Attachments are not intended to be modified by the user.
Storage and Handling
Warning: The RF safety of the device has not been tested. The patient may only be imaged by landmarking at least 30 cm from the implant, or ensuring the implant is located outside of the RF coil.
A patient with this device can be scanned safely in an MR system under the following conditions:
Implant Attachments | Implant Attachments Ti-6Al-4V ELI Abutments |
Static Magnetic Field Strength (B0) | ≤ 3.0T |
Maximum Spatial Field Gradient | 30 T/m (3,000 gauss/cm) |
RF Excitation | Circularly Polarized (CP) |
RF Transmit Coil Type | For body transmit coil, landmarking at least 30 cm from the implant, or ensuring the implant is located outside of the coil. Extremity T/R coils permitted. Excludes Head T/R coil. |
Operating Mode | Normal Operating Mode in the allowed imaging zone |
Maximum Whole-Body SAR | 2W/kg (Normal Operating Mode) |
Maximum Head SAR | Not evaluated for head landmark |
Scan Duration | No specific constraints due to implant heating |
Indications for Use
- Biohorizons Tapered Tissue Level implants in diameters 3.8, 4.2, 4.6 and 5.2mm
- Nobel Biocare NobelActive 3.5, 4.3, 5.0 mm diameter implants, NobelParallel CC 3.75, 4.3, 5.0mm diameter implants, and NobelReplace Conical Connection 3.5, 4.3, and 5.0 diameter implants.
- Implant Direct Legacy 3 for 3.7, 4.2, 4.7, 5.2mm diameter implants
- Surgikor Versatile for 3.5, 3.75, 4.2, 4.5, 5.0, 6.0mm diameter implants
- Surgikor Fixation for 3.5, 3.9, 4.3, 5.0mm diameter implants
- Surgikor Solution for 3.5, 4.0, 4.5, 5.0, 5.5, 6.0mm diameter implants
- Neodent Grand Morse for 3.5, 3.75, 4.0, 4.3 and 5.0 mm diameter implants
- MIS Seven for implant diameters 3.75, 4.2, 5, and 6mm
- Zimmer for Tapered Screw-Vent in 3.7, 4.1 and 4.7mm implant diameter
- Hiossen ETIII for 3.5, 4.0, 4.5, 5.0, 5.5, 6.00, and 7.00 mm implant diameters
- SIN Cone Morse 11.5° and 16° implant lines
- 11.5° Strong SW/SW Plus implant diameters 3.5, 3.8, 4.5, 5.0mm Unitite implant diameters 3.5, 4.0,4.3, 5.0, 6.0 Tryon CM Conical implant diameters 3.5, 4.5, 5.0 Tryon CM Cylindrical implant diameters 3.5, 3.75, 4.0, 5.0 Epikut CM/CM Plus implant diameters 3.5, 3.8, 4.0, 4.5, 5.0
- 16 ° Strong SW CM/CM Plus implant diameters 3.5, 3.8, 4.5 and 5.0mm Epikut S/S Plus implant diameters 3.5, 3.8, 4.0, 4.5, 5.0mm
Device Description
- Hypersensitivity to components of the abutment.
Warnings
- Abutments are non-sterile for single use only and should be sterilized according to the instructions found below; they should not be re-sterilized.
- Do not use the abutment if it appears damaged.
- Building the crown on top of the implant immediately after implantation may disturb the osseointegration process and cause dental implant failure.
Precautions
- During the planning phase it is important to determine the availability of adequate bone mass for implant placement and to confirm that the available occlusal space is sufficient to accommodate the proposed abutment and final restoration. Minimizing the trauma to the host tissue increases the potential for successful osseointegration.
- CAUTION: Electro-surgery should not be attempted around metal implants, as they are conductive.
- Carefully measure the needed occlusal clearance and mark the temporary abutment accordingly.
Limitations of divergence from vertical placement of the implants
Warning: Using higher than recommended torque values could fracture the click attachment.
Impression and Stone Model Fabrication: Indirect Technique: With the denture retention attachments torqued into place, snap the impression copings on the abutments until they are seated firmly. Proceed by taking an impression. Remove the tray and snap an analog into each of the impression copings. Capture the abutment position in stone using standard methods for fabricating a laboratory stone model.
Prosthesis Fabrication: Seat the denture retention attachment housing and the processing inserts on each of the attachments. Secure the denture retention attachment housing to the prosthesis using autopolymerizing or light cure acrylic or composite resin pickup technique.
NOTE: Excessive occlusal pressure during the setting time may cause tissue recoil against the denture base and could contribute to dislodging and premature wear of the replacement males.
Prosthesis Delivery: Once the fit of the prosthesis is verified, remove the processing inserts from each denture retention attachment housing. Replace them with the lowest retention level inserts initially and increase the retention if needed. Firmly snap the prosthesis into place, ensuring that each insert is fully engaged onto each abutment.
Cleaning: Good oral hygiene is vital to attachment success. The patient should be made aware of the following: the denture retention attachments must be thoroughly cleaned each day to prevent plaque build-up and the patient should use a soft nylon bristle or end-tufted toothbrush with a non-abrasive toothpaste to clean the abutments. The coarse particles in abrasive toothpaste may scratch the surfaces of the abutments and cause plaque accumulation. An irrigation system is recommended to flush out debris from the inside of the denture retention attachment inserts. Each night, remove the overdenture and immerse in a cup of plain water.
Regular Dentist Visits: The inserts are made of a soft plastic material to allow the overdentures to be removed/replaced regularly. Plastic materials are subject to wear as part of normal use and may require replacement. Bruxism wears the denture retention attachments and may reduce the longevity of the inserts. Patients should be instructed to maintain routine follow-up visits for hygiene and attachment function evaluation. Abutments must be re-tightened at follow-up visits to the torque specifications outlined above. Failure to re-tighten abutments could lead to screw loosening and abutment fracture. Follow-up visits are recommended at six-month intervals.
Inserting and Removing the Overdentures: The patient should be instructed on how to properly insert the overdenture. The patient should make sure that they can feel that it is positioned over the abutments prior to applying pressure. The patient should use both hands and press down on each side and firmly snap the overdenture into place.
CAUTION: THE PATIENT MUST NOT BITE THE OVERDENTURE INTO PLACE, as this force will result in improper wear of the abutments, including the inserts in the overdenture. Remove the overdenture by placing the thumbs under the edges of the overdenture flanges and pulling each side upward or downward (as applicable) simultaneously. Use of the tongue may aid in removal. Once removed, a thorough cleaning is recommended.
All abutments and instruments are supplied NON-STERILE.
Step 2 – Autoclave sterilize (gravity) using 121° C (250°F) for 30 minutes.
Step 3 – Dry time is 30 minutes
The validated procedures require the use of FDA-cleared sterilizers, sterilization trays, sterilization wraps, biological indicators, chemical indicators, and other sterilization accessories labeled for the sterilization cycle recommended. The health care facility should monitor the sterilizer for the facility according to an FDA recognized sterility assurance standard such as ANSI/AAMI ST79:2010.
Symbols Glossary
 | Manufacturer |
 | Prescription Only |
 | Lot Number |
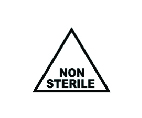 | Non-Sterile |
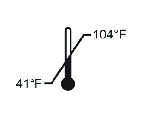 | Room Temperature Fahrenheit |
 | Read the Instruction for Use |
 | Single Use |
 | Expiry Date |
 | Magnetic Resonance Conditional (Poses no known hazards in specific MRI environments and conditions) |


